Start with a Jenkins job that shows where and under which account its command runs. Then record the repeatable steps in Git and a Jenkinsfile. The example uses a small addition function and two tests without requiring external Python packages.
Getting started with Jenkins · 01 Installing Ubuntu · 02 Installing Rocky Linux 9 · 03 First job and Pipeline · 04 Utilizing automation
On this page
Controller manages and agent executes
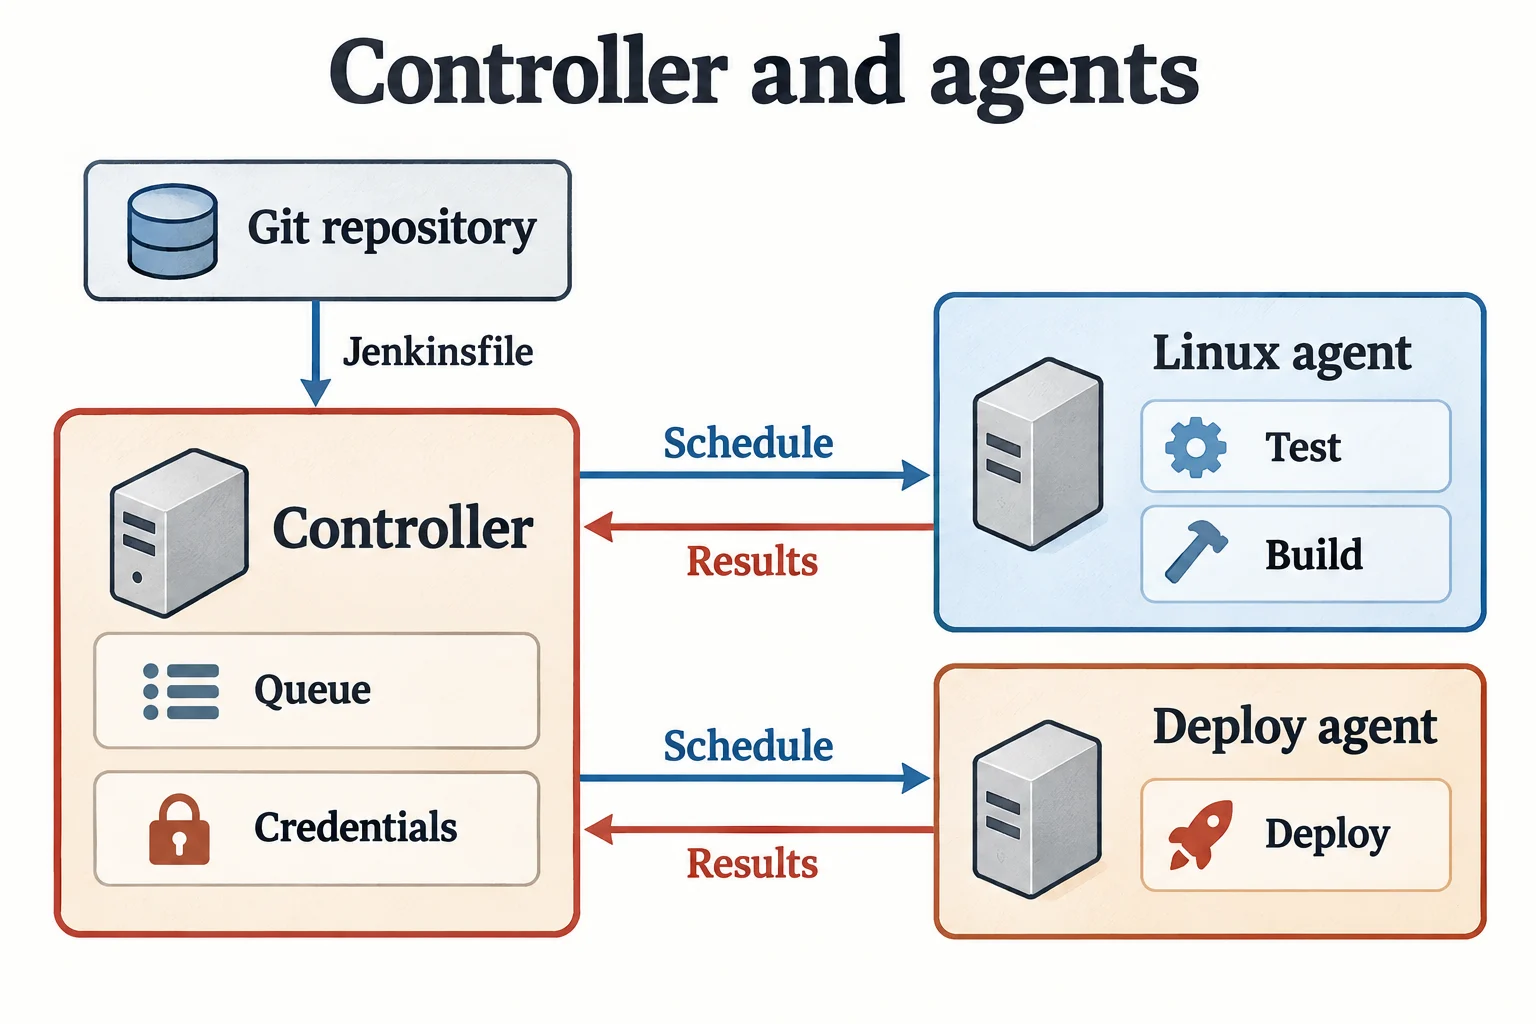
The controller manages job settings, execution queues, and credentials. An agent is a machine that actually runs shell commands. executor is a task slot that can be executed simultaneously, and workspace is the working directory where the task checks out and processes files.
When you run a build on a controller, the files the build can read and the controller’s sensitive files are placed on the same machine. So, for this exercise, we connect a separate agent and then change the number of executors on the embedded node to 0. You can refer to Controller Isolation Recommendation and Agent Usage Guide together.
1. Prepare a Linux agent for learning
The agent is a different VM than the controller, and the address is 192.168.56.31 as an example. Your VM must have an SSH server ready. Run only one package command, either Ubuntu or Rocky Linux.
Ubuntu Agent
sudo apt update
sudo apt install -y openjdk-21-jre-headless git python3
Rocky Linux 9 Agent
sudo dnf install -y java-21-openjdk-headless git python3sudo useradd --create-home --shell /bin/bash ciagent
sudo install -d -o ciagent -g ciagent -m 0750 /home/ciagent/work
sudo install -d -o ciagent -g ciagent -m 0700 /home/ciagent/.ssh
java -version
git --version
python3 --versionciagent is an example new practice account. If you already have the same name, do not create the account again; check its purpose and permissions first. You do not need to give sudo permissions to this account. Register the public key of the SSH key to be used by the controller as ~/.ssh/authorized_keys in this account, set the file owner as ciagent, and set permissions as 0600.
Create a dedicated key on the management PC and send only the public key file to the agent. Below is an example where the new key file name is jenkins-ciagent. If the same file already exists, do not overwrite it but use a different name. The passphrase set during creation will also be entered into your Jenkins credentials later.
ssh-keygen -t ed25519 -f ./jenkins-ciagent -C jenkins-ciagent
scp ./jenkins-ciagent.pub labadmin@192.168.56.31:/tmp/jenkins-ciagent.pub
Register the public key in the agent VM’s administrator terminal. Replace labadmin and IP with the values of a VM that you can manage through SSH.
sudo tee -a /home/ciagent/.ssh/authorized_keys < /tmp/jenkins-ciagent.pub >/dev/null
sudo chown ciagent:ciagent /home/ciagent/.ssh/authorized_keys
sudo chmod 0600 /home/ciagent/.ssh/authorized_keys
rm -f /tmp/jenkins-ciagent.pub
Register the private key as Username ciagent, ID linux-ci-ssh in Jenkins’ Credentials → SSH Username with private key. Enter the contents of the private key file in Enter directly under Private Key, and also include the passphrase set when creating the key. The range System is suitable when used for agent connections in Jenkins itself. I don’t put my keys and passwords in Git. Please check the type and scope of use in Jenkins Credential Guide.
2. Register SSH agent
- Manage Check whether SSH Build Agents is installed in Jenkins → Plugins.
- Create a Permanent Agent named
linux-ci-01in Manage Jenkins → Nodes → New Node. - The remote root directory is
/home/ciagent/work, Labels arelinux-ci, and the executor specifies 1 as the learning start value. - Usage is specified in such a way that only operations that match the label expression are executed.
- Select Launch method as Launch agents via SSH, Host as actual agent IP, and Credentials as
linux-ci-ssh. - SSH host key verification uses Known hosts file Verification Strategy. Use the procedure below to register the host key in the controller’s Jenkins account and connect.
- When the agent becomes Online, set the executor of the Built-In Node to 0.
The host key is a value that verifies the identity of the server to which you are connecting. Check the fingerprint with the command below in the agent console.
sudo ssh-keygen -lf /etc/ssh/ssh_host_ed25519_key.pubOn the controller, check if the fingerprint collected by the following command matches the value in the agent console. Only if it matches Register in known_hosts with the last two lines. ssh-keyscan I do not trust the other person just because I received the results.
CI_HOSTKEY_FILE=$(mktemp)
ssh-keyscan -t ed25519 192.168.56.31 > "$CI_HOSTKEY_FILE"
ssh-keygen -lf "$CI_HOSTKEY_FILE"

# 에이전트 콘솔의 지문과 대조해 일치한 경우에만 진행
sudo install -d -o jenkins -g jenkins -m 0700 /var/lib/jenkins/.ssh
sudo tee -a /var/lib/jenkins/.ssh/known_hosts < "$CI_HOSTKEY_FILE" >/dev/null
sudo chown jenkins:jenkins /var/lib/jenkins/.ssh/known_hosts
sudo chmod 0600 /var/lib/jenkins/.ssh/known_hosts
rm -f "$CI_HOSTKEY_FILE"
The SSH method connects from the controller to the agent’s SSH port. For this example, there is no need to separately open inbound port 50000 on the controller. The plug-in’s connection method and verification options were confirmed based on the SSH Build Agents document .
3. Check execution location with Freestyle task
- In the dashboard, create
first-agent-checkwith New Item → Freestyle project. - In Restrict where this project can be run, enter
linux-ci. - In Build Steps, add Execute shell and save the command below.
- Build Now → Check the user/path/tool version in the corresponding build → Console Output.
set -eu
whoami
hostname
pwd
java -version
python3 --version
git --version
If the user is ciagent and the path is under the agent’s work, then it ran where intended. Look at these two values before the success indication in the console. When commands that work on a PC do not work in Jenkins, the execution account, PATH, and current directory are often different.
4. Create a small Git repository to test
Save the following three files to a Git repository that you manage. The tests only use the Python standard library unittest, so no pip installation is required.
jenkins-demo/
├── app.py
├── tests/
│   └── test_app.py
└── Jenkinsfile
app.py
def add(a, b):
    return a + b
tests/test_app.py
import unittest
from app import add


class AddTest(unittest.TestCase):
    def test_positive_numbers(self):
        self.assertEqual(add(2, 3), 5)

    def test_negative_numbers(self):
        self.assertEqual(add(-2, -3), -5)


if __name__ == "__main__":
    unittest.main()
First check if both tests pass by running python3 -m unittest discover -s tests -v in the repository root. The Python file and package creation commands in this example were verified by running them in a separate working directory. You must check the connection/permission/plugin combination in Jenkins using the procedure below on your VM.
5. Write execution order in Jenkinsfile
pipeline {
    agent { label 'linux-ci' }

    options {
        skipDefaultCheckout(true)
        disableConcurrentBuilds()
        timeout(time: 10, unit: 'MINUTES')
        buildDiscarder(logRotator(numToKeepStr: '20'))
    }

    stages {
        stage('Checkout') {
            steps {
                deleteDir()
                checkout scm
            }
        }
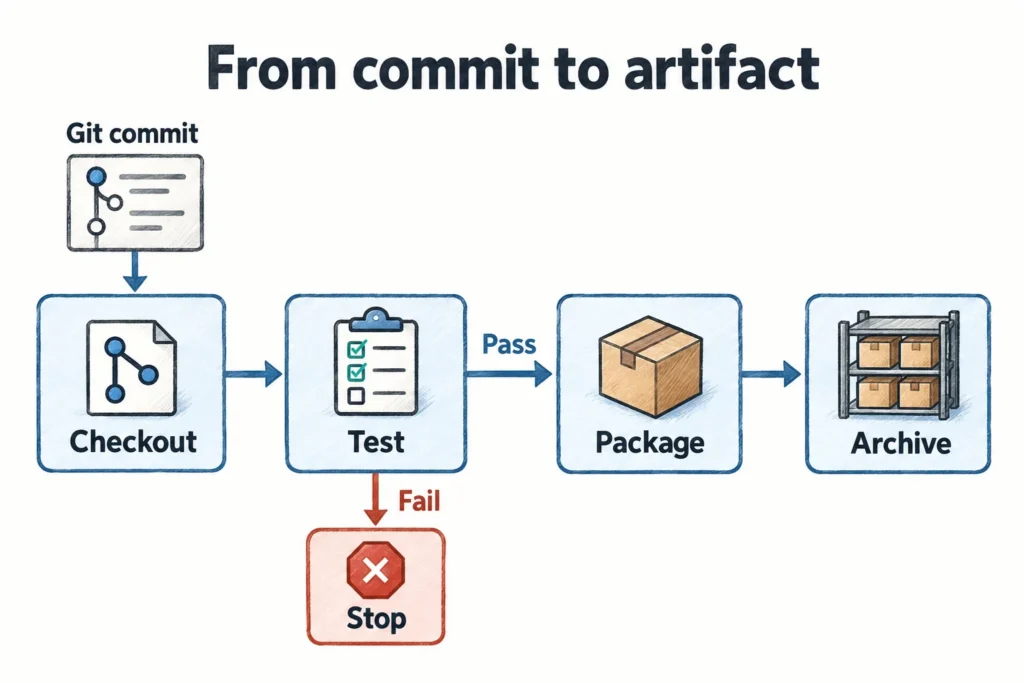
        stage('Test') {
            steps {
                sh 'python3 -m unittest discover -s tests -v'
            }
        }
        stage('Package') {
            steps {
                sh 'mkdir -p dist && tar -czf dist/app.tgz app.py'
            }
        }
        stage('Archive') {
            steps {
                archiveArtifacts artifacts: 'dist/app.tgz', fingerprint: true
            }
        }
    }
    post {
        success { echo 'Tests passed; artifact archived.' }
        failure { echo 'Build failed. Check the first failing stage.' }
        cleanup { deleteDir() }
    }
}
Bypass automatic checkout with skipDefaultCheckout(true) and explicitly run checkout scm once during the Checkout step. SCM stands for source management repository. This example assumes the task Pipeline script from SCM, which you create in the next step. In the case of pasting only the script on the Jenkins screen, it may not work as it is because there is no scm information. Please also check the Jenkinsfile usage document.
| settings | Why we need it in this example |
|---|---|
| linux-ci label | Select an agent with tools and accounts ready to run |
| disableConcurrentBuilds | Limit simultaneous execution of the same task. It is not a setting that locks down different deployment tasks. |
| timeout | Limit execution on assigned agents from continuing indefinitely. Top-level timeout does not include agent waiting |
| buildDiscarder | Limit the number of archives to prevent build records and output from accumulating endlessly |
| deleteDir | Clean up your current workspace. This is not a command to delete Git and its archived output. |
| fingerprint | Fingerprint records for tracking archived deliverables. Not a replacement for security signatures or SBOMs |
The application location and grammar of the option can be checked in Declarative Pipeline grammar. The above example contains only the order of checkout, testing, packaging, and storage, and does not include server deployment.
6. Read Pipeline in Git and try to fail once.
- Commit the three files to Git and push them to the remote repository.
- Create a new task with New Item → Pipeline and specify the Definition as Pipeline script from SCM.
- Select Git in SCM and enter your repository URL and branch. For example, for the main branch, use
*/main. - If it is a private repository, choose credentials for read-only access. Do not write the token directly in the URL.
- Leave the Script Path as
Jenkinsfile, save it, and run Build Now. - If successful, check the
dist/app.tgzoutput on the build page. - Commit by intentionally changing the expected value of the test from 5 to 6. When you run it again, notice that Test fails and the new Package·Archive step does not run.
- Upload a commit that sets the expected value back to 5. Identify the output of previous successful builds and the current failed build.
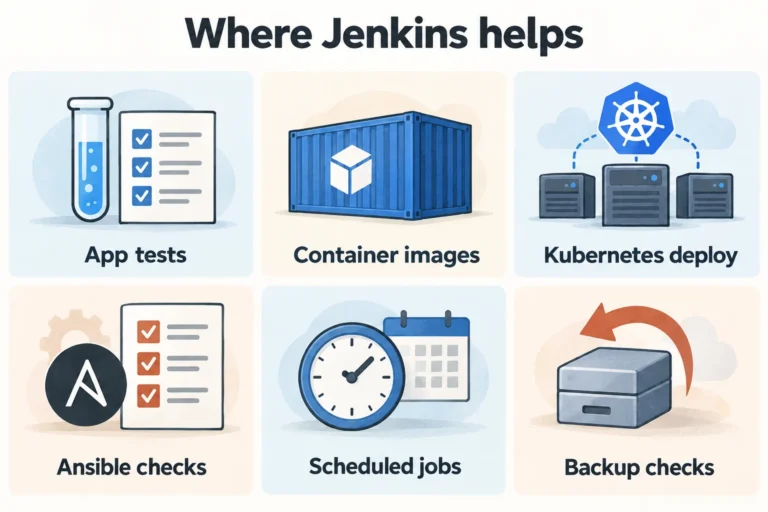
At first, it is easier to run it with a button and check the flow. It is not too late to add automatic execution after the manual execution has passed. 04 Leveraging Automation expands the scope to Git change detection, container images, Kubernetes deployment, and operational inspection.