A VMware-to-AHV migration requires guest boot preparation as well as disk conversion. Use dracut to include the required AHV drivers in initramfs, shut down the VM, then convert its VMDK to qcow2 with qemu-img. Register the image in Prism and attach it to a new VM before testing on an isolated network.
This article describes a manual V2V procedure for a typical local disk VM on the Rocky Linux 9 family. V2V is the process of moving a virtual machine to another virtualization environment. It is tailored to the practice of checking each step without using Nutanix Move, and is separate from the actual VMware → AHV migration success record.
On this page
Scope of work and overall flow
Nutanix recommends using Move for VM migration. Manual migration also requires checking the VirtIO drivers, regenerating the initramfs, and checking boot settings that depend on device names. You can check this flow in Nutanix’s Linux VM migration guide.
| Category | Standards for this article |
|---|---|
| original | x86_64 Rocky Linux 9 VM on VMware ESXi/vSphere, local VMDK |
| boot | Configuration that maintains existing BIOS or UEFI and does not rely on Secure Boot·vTPM |
| storage | Migrate a regular partition or LVM, along with all associated virtual disks |
| convert work pc | Install Ubuntu 24.04, qemu-utils |
| target | Nutanix AHV, VirtIO SCSI disk and VirtIO NIC confirm guest OS support |
Do not apply the dracut commands unchanged to an Ubuntu or Debian initramfs-tools configuration. RDM, shared disks, encrypted VMs, TPM-bound LUKS, multipath and network-root systems require a separate migration design. Check guest support in the compatibility documentation for your AOS/AHV version.
- Secure the firmware, disk, and network configuration of the original VM and a recoverable backup.
- Inside VMware’s Linux, check the VirtIO module and recreate the initramfs with dracut.
- Stop the application, shut down the VM, and export the disk in its current state.
- Convert the VMDK to qcow2 on your work PC and check for content consistency.
- After registering with the Prism image service, connect to an AHV VM with the same boot method.
- Check booting, data, and services on the isolated network and switch to the operational network.
What dracut creates is the initial boot file for Linux, initramfs. qcow2 is a virtual disk file format, and qemu-img is responsible for this conversion. A single disk file does not contain the entire VM settings such as vCPU, memory, NIC connections, and VMware NVRAM.
1. Boot method and disk history of the original VM
First, record the VM’s BIOS/UEFI, Secure Boot status, vCPU/memory, capacity/controller/connection order for each disk, and port group/VLAN in vSphere. Check if the OS disk is scsi0:0 and if there are additional data disks or LVM configuration disks. Prepare an account to log in to the VM console and also prepare the installation ISO.
Next, run within the original VMware Linux VM. sudo -i This section and the dracut preparation steps are performed in the same root Bash session.
sudo -i
cat /etc/os-release
uname -r
if [ -d /sys/firmware/efi ]; then
  printf 'UEFI boot\n'
else
  printf 'BIOS boot\n'
fi

lsblk -o NAME,SIZE,TYPE,FSTYPE,UUID,MOUNTPOINTS
blkid
findmnt /
cat /etc/fstab
grubby --default-kernel
grubby --info=DEFAULT
ip -br address
nmcli connection show
Check whether root= and /etc/fstab in the kernel have values that depend on the connection order, such as /dev/sda2. SCSI disks in AHV do not always change to /dev/vda. Because VirtIO SCSI and VirtIO block have different names visible to the guest, existing device names are not replaced with expected names.
The general file system uses the UUID confirmed as blkid, and the LVM root checks whether the existing /dev/mapper/… and rd.lvm.lv=… match the actual VG/LV. /boot, EFI, swap, and data mount are also checked. dracut boot arguments document describes how to identify the root device by UUID/LABEL.
If you need to change the value, back up the settings below and then modify them. Changing root’s root= must also be reflected in the corresponding kernel’s boot entry, so don’t just change fstab and call it a day. You do not need to reinstall GRUB to prepare for a normal migration.
2. Check the kernel and VirtIO module to boot next
uname -r is the currently running kernel. If you did not reboot after updating, the kernel may be different from the next boot. Refer to grubby’s How to Check Default Kernel, here we explicitly select the default boot kernel.
boot_kernel="$(grubby --default-kernel)"
kver="${boot_kernel##*/}"
kver="${kver#vmlinuz-}"
printf 'Target kernel: %s\n' "$kver"

test -d "/lib/modules/$kver" || {
  printf 'Target kernel modules are missing\n' >&2
  exit 1
}

for driver in virtio_pci virtio_scsi virtio_blk virtio_net; do
  modinfo -k "$kver" -F filename "$driver" || exit 1
done
df -h /boot /| module | role |
|---|---|
virtio_pci | Driver to connect PCI-based VirtIO devices |
virtio_scsi | Controller driver for the AHV SCSI disk we will use in this article |
virtio_blk | VirtIO block type disk driver |
virtio_net | AHV VirtIO Network Device Driver |
Here modinfo checks whether the module exists in the selected kernel. Just because VMware doesn’t see VirtIO for lsmod, it doesn’t determine that the driver is missing. Modules on unused devices may not be loaded.
If there is no module, first check the kernel module package and OS support status for the kernel version. Do not copy .ko files from other kernels. Kernel built-in drivers may be displayed as (builtin), and in this case, it is normal for there to be no separate .ko in initramfs.
3. Create initramfs including VirtIO with dracut
Save the current initramfs and settings first. The backup path is recorded so that it can be checked in the future even when VMware fails to boot. Avoid using VM snapshots as your only backup.
prep_backup="/root/ahv-v2v-prep-$(date +%Y%m%d-%H%M%S)"
install -d -m 700 "$prep_backup"
cp -a /etc/fstab /etc/default/grub /etc/dracut.conf.d "$prep_backup/"
cp -a "/boot/initramfs-${kver}.img" "$prep_backup/"
grubby --info=ALL > "$prep_backup/grubby-info.txt"
if [ -d /boot/loader/entries ]; then
  cp -a /boot/loader/entries "$prep_backup/"
fi
printf 'Backup: %s\n' "$prep_backup"
The following settings will cause the VirtIO module to be added even when the initramfs is recreated in the future. If the same file already exists, check the backup and existing contents and merge them. add_drivers is an entry that adds a kernel driver, and is different from add_dracutmodules, which specifies the dracut function module. dracut follows the grammar of the configuration document .
cat > /etc/dracut.conf.d/90-ahv-v2v.conf <<'EOF'
add_drivers+=" virtio_pci virtio_scsi virtio_blk virtio_net "
EOF

dracut --force --verbose --no-hostonly \
  "/boot/initramfs-${kver}.img" "$kver"
--force overwrites the specified initramfs. --no-hostonly currently avoids configurations tailored only to VMware devices and creates a more generic initial image. The size can be large, so you should check the /boot space first. Check dracut --help for support options for your version of dracut. dracut command documentation lists options and how to specify the kernel version.
If an error occurs, do not export the disk, but first resolve missing modules or insufficient space. After success, check the file contents and dracut function module.
ls -lh "/boot/initramfs-${kver}.img"
lsinitrd "/boot/initramfs-${kver}.img" \
  | grep -E 'virtio_(pci|scsi|blk|net).*\.ko'
lsinitrd -m "/boot/initramfs-${kver}.img"
grubby --info=DEFAULT
lsinitrd is a command that shows the inside of the generated image. Check whether the VirtIO driver and dependencies provided as external modules are included. If it is an LVM root, check the lvm function and check whether the kernel, initrd, and root arguments of the default boot item match the prepared targets. You can refer to lsinitrd usage instructions.
Do not remove the VMware storage drivers or open-vm-tools at this stage. If possible, reboot once in VMware using the prepared kernel and confirm the root and data mounts before the final export. This check does not replace an AHV boot test.
4. Export VMDK in current state after VM shutdown
Stop the application and database according to their documented procedures, shut Linux down normally, and confirm that the VM is powered off in vSphere. Running sync alone is not enough. Do not copy the disks while the VM is suspended.
systemctl poweroffExport the VM using vSphere’s Export OVF Template, and keep the downloaded OVF, VMDK, and manifest in the same working folder. Menu location varies depending on client version. Broadcom’s OVF/OVA export guide also assumes that the power is turned off.
If only the base disk.vmdk is fetched from the datastore of the VM where the snapshot is located, the latest writes may be missed. Check whether the export result includes the current state, and if you are copying files directly, complete the snapshot cleanup and integration in VMware and then secure the related files. Do not delete -delta.vmdk or -sesparse.vmdk directly from the file manager. Check the VMware snapshot structure first.
| imported file | Processing when converting |
|---|---|
| Single VMDK in OVF export | Enter the appropriate VMDK. If there are multiple disks, convert them individually. |
descriptor + -flat.vmdk | Place both files together and enter the small descriptor .vmdk. |
| Split VMDKs | Maintain relative paths for descriptor and all extent files. |
| Snapshot Chain·Missing Parent·Encryption VMDK | Abort the conversion and get the complete export results back from VMware. |
VMDKs in OVF/OVA are stored in stream-optimized format and may be smaller than the original allocated capacity. It doesn’t determine missing disk or data loss just by looking at the file size. Broadcom’s exported VMDK size description Divide the virtual capacity and physical file size to check.
If you received it as an OVA, check the list as shown below in the conversion task PC and extract it to a separate directory. The file name is an example; replace it with the actual exported file.
tar -tf rocky9-export.ova
mkdir rocky9-export
tar -xf rocky9-export.ova -C rocky9-export
Distinguish between OS and data disks by comparing the disk reference in the OVF with the original record. If you only move the boot disk and leave out other PVs in LVM or the essential data disk in fstab, it may not start properly.
5. Convert VMDK to qcow2 on your work PC
Run the following steps on a separate Ubuntu 24.04 conversion PC, not on the source VM or a Nutanix CVM. Install the package and provide space for every source VMDK and converted image. Required free space depends on virtual capacity, used data and the output allocation format.
sudo apt-get update
sudo apt-get install -y qemu-utils
qemu-img --version
df -h .

cd rocky9-export
ls -lh
qemu-img info --backing-chain -f vmdk rocky9-disk1.vmdk
Replace rocky9-disk1.vmdk with the actual OS disk name. Use info to compare the format and virtual capacity with the source and check for missing parent or extent files. Do not run qemu-img against a source disk that is in use.
Once the input file is confirmed, we create a new qcow2. If the output file already exists, either use a different name or check first if it is an old result. OpenStack official image conversion example -f vmdk -O qcow2 combination, such as .
qemu-img convert -p -f vmdk -O qcow2 \
  rocky9-disk1.vmdk rocky9-os.qcow2
-p is the progress, -f is the input format, and -O is the output format. Multi-disk VMs run each OS and data disk separately and leave a correspondence table. Do not list multiple VMDKs as input to one command and combine them into one OS image.
6. Format check and compare disk contents
After conversion, perform the three checks below. check checks qcow2 structural consistency, separately from guest filesystem and application checks. compare compares the guest-visible disk content of two image formats. See the QEMU qemu-img documentation for the commands and exit codes.
qemu-img info -f qcow2 rocky9-os.qcow2
qemu-img check -f qcow2 rocky9-os.qcow2
qemu-img compare -p -f vmdk -F qcow2 \
  rocky9-disk1.vmdk rocky9-os.qcow2
echo "$?"

sha256sum rocky9-os.qcow2 > rocky9-os.qcow2.sha256
Verify that compare is successful and the exit code output immediately afterwards is 0. The virtual capacity before and after conversion must also be the same. The file SHA-256 of VMDK and qcow2 do not have to be the same since the file format and metadata are different. The checksum you create is used to verify transmission integrity when qcow2 is moved to another upload PC.
If the capacity and comparison results are different, select the original and check for missing files before registering the Prism. The mere fact that qcow2 is made small does not guarantee actual copy times or data compression rates.
7. Prism image registration and AHV VM creation
Upload qcow2 to Prism as a disk image. Prism Element uses Settings → Image Configuration → Upload Image; Prism Central uses its Images management screen. Names and locations vary by version. Do not register it as an ISO. The Cisco Nutanix AHV qcow2 upload procedure uses the same image service path.
- Enter a name that identifies the role, such as
rocky9-os, and select the typeDisk. - Upload the qcow2 file from your work PC. If it is a URL method, the address must be accessible not only from the browser but also from the cluster.
- Wait until the upload/conversion operation succeeds and becomes available on the target cluster.
- If there are multiple disks, each qcow2 is registered and the original disk correspondence table is maintained.
Create a new AHV VM and match the vCPU/memory and boot method of the original. The registered image is connected to the disk with Clone from Image Service, and the SCSI bus is used in this article. Refer to the VM creation/UEFI section of the Nutanix AHV 6.8 Management Guide, but check the actual menu in the installation version.
| item | Settings and Confirmation |
|---|---|
| firmware | Leave BIOS as BIOS and UEFI as UEFI. Format conversion does not convert firmware. |
| OS disk | Clone the OS image to a SCSI disk and confirm it as a boot target. It will not create a blank disk instead. |
| data disk | Connect each image according to its original role and order. |
| NIC | Uses VirtIO NIC and isolated network for verification. |
| first console | Check disk recognition and boot errors directly from the Prism console. |
UEFI boot entries may have been stored in VMware’s NVRAM. Even if qcow2 has an EFI system partition, the boot entries of the new AHV VM require separate verification. If you see No bootable device, check the firmware and EFI partition/bootloader path. Do not attempt to fix errors in this step by simply recreating the dracut.
8. Check disks and NICs on first boot
Keep the original VM in a shutdown state and boot the AHV VM first in an isolated network. Prevent two VMs with the same IP from operating simultaneously on the operating network or from running duplicate scheduler/DB tasks. You should be able to log in to the console even without a network connection.
sudo -i
uname -r
lsblk -f
findmnt /
findmnt --verify --verbose
systemctl --failed
journalctl -b -p err --no-pager
ip -br link
ip -br address
nmcli device status
nmcli connection show
Verify that all expected disks and mount points exist. Even if there is no error of findmnt --verify, it does not mean that the application data is normal. DB recovery status, data path, service account/permissions, and required daemons are also checked separately.
If VMware interface ens192 has a different name or MAC address on AHV, its NetworkManager profile may no longer bind to the NIC. Run this example only from the AHV console. Replace PROFILE_UUID and NEW_NIC with the actual values found above. The example assumes a single Ethernet profile.
nmcli connection show "PROFILE_UUID"
nmcli connection modify "PROFILE_UUID" \
  connection.interface-name "NEW_NIC" \
  802-3-ethernet.mac-address ""
nmcli connection up "PROFILE_UUID" ifname "NEW_NIC"

ip -br address
ip route
nmcli device show "NEW_NIC"
This command changes the NIC name condition while maintaining the IP, gateway, and DNS of the existing profile, and turns off the old MAC’s device matching condition. You can check the meaning of each condition in the NetworkManager profile properties document. In multiple NIC/bond/VLAN configurations, each profile and physical connection are mapped separately.
If fixed MAC settings, match conditions, and user udev rules remain, further checks are required. We first check whether the existing IP can be used as is in the verification network, and when switching to the actual operating network, we check the IP, VLAN, routing, DNS, and firewall. To check your settings in detail, please refer to the article Rocky Linux 9 Static IP and connection recovery article .
Where to check when booting stops
| symptoms | What to check first | next action |
|---|---|---|
No bootable device | BIOS/UEFI, OS disk, EFI bootloader | Check the firmware/boot target of the new VM. |
dracut-initqueue timeout | VirtIO driver, root=, LVM, missing disk | Check the console log and initramfs. |
| The route comes up and enters emergency mode. | fstab‘s required mount and UUID | Check for missing disks and invalid entries. |
| Login but no network | NIC name·MAC conditions, VLAN, IP·path | Check the profile and AHV NIC connectivity in the console. |
The dracut shell starts by checking the available commands. You can check whether the disk itself is missing or the root identification is incorrect by checking below. The lvm tool can only be used if it is included in an image.
cat /proc/cmdline
ls /dev/sd* /dev/vd* 2>/dev/null
blkid
cat /run/initramfs/rdsosreport.txt

# LVM 루트이며 lvm 명령이 있는 경우
lvm pvs
lvm vgs
lvm lvs
If necessary, temporarily remove quiet and rhgb from the relevant GRUB boot entry and add rd.debug to collect logs. As described in Red Hat’s dracut-initqueue timeout guidance, this message can also mean that the root device was not found. Do not immediately format or initialize the filesystem.
If VirtIO is missing, supplement Lee Kwan-yong’s initramfs in the original VMware VM and export it again, or properly mount /boot separately from the target root in the Rescue environment of the installation ISO, then chroot and recreate it. uname -r in Rescue is an installation ISO kernel, so it is not written as the target OS kernel version. First you need to check the target /lib/modules and boot entry.
Conditions for operational network conversion and return to original source
The transfer does not complete with just one boot from the AHV. Restart it and check that it comes up with the same kernel and that data mounts, network profiles, and service auto-start are maintained. After checking business read/write and monitoring/backup connections, it is switched to the operational network.
Original VMware VMs and backups are retained for a specified validation period. If an operational write has not occurred in the AHV, recovery is possible by terminating and isolating the AHV VM and then turning the original back on. After the operating data is changed in the new VM, the original data is from the previous point in time, so it cannot be completed with a simple power recovery. First determine data recovery/synchronization procedures for each application.
When repeating the same operation with the next VM, it is easy to find differences if you leave the target kernel, initramfs check result, correspondence table between VMDK and qcow2, content comparison result, and first boot log.
Documentation standards and verification scope
The official document confirmation standard is 2026-10-23. Prism’s screen/guest support must be checked again with the installed AOS/AHV version. For instructions on image registration and VM creation, refer to the publicly available AHV 6.8 management guide and vendor documentation.
In QEMU 8.2.2 of Ubuntu 24.04, I created streamOptimized VMDK and descriptor+flat VMDK with a 64 MiB temporary disk containing a non-zero pattern, and confirmed that qcow2 conversion, structure check, and content comparison were successful, respectively. This is the confirmation scope of the conversion command, and dracut regeneration of the actual guest exported from VMware and AHV boot/service conversion were not performed.
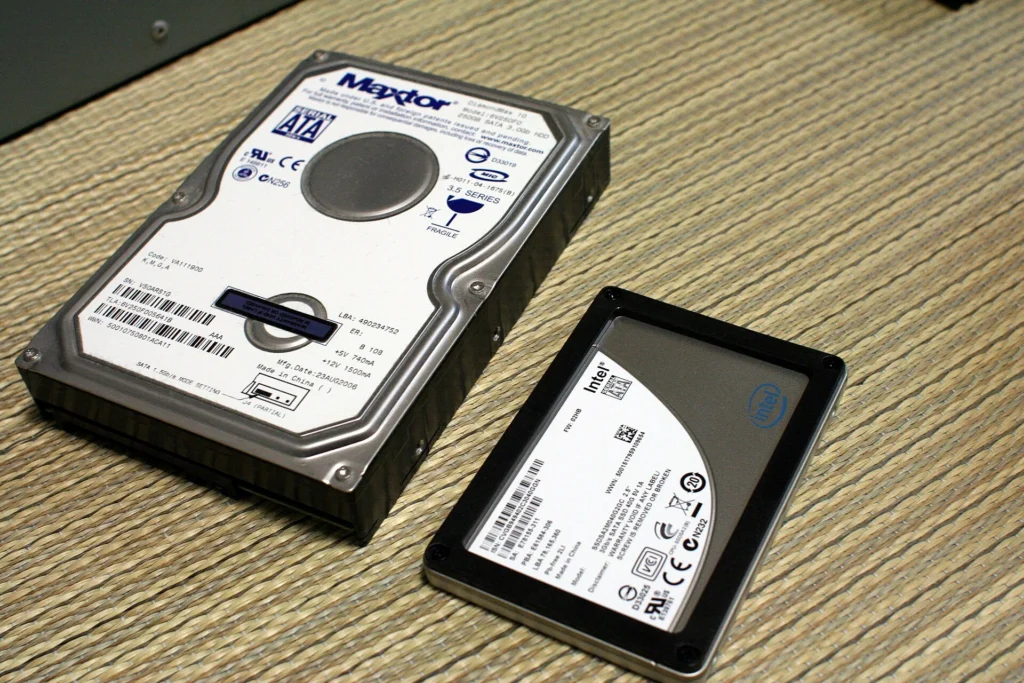
The representative image is a reference photo of a physical HDD/SSD. This photo is not of the transferred VM or Nutanix equipment. Photo Original · machu. · CC BY-SA 2.0. We reused the WebP conversions saved on the site and apply the same license to the converted images.